The Best Tools To Take Measurements For Building And DIY
RH Business Marketing Solutions
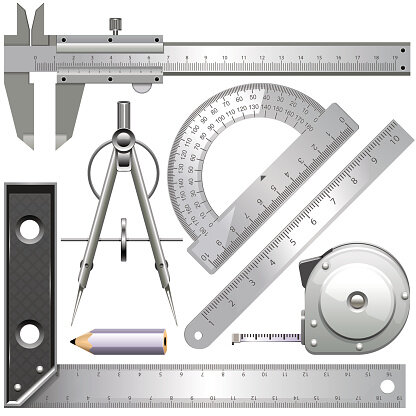
When you open a toolbox, one of the tools that you might stumble on is a measuring tool. There are many types of measuring tools available that are used for both small to huge jobs. Examples of measuring tools builders use include a folding ruler, tape measure, laser measure, levels, laser levels, and sometimes a dumpy level or a rotary level.
Whether you are a homeowner or an apartment dweller, one skill you might want to have that will be useful is being able to accurately measure. This skill is helpful if you want to build something or do a repair by yourself. Even the simplest hanging of display or decorative in your room, you might want to measure the distance first for a proportion display, for building and calculating materials needed, or to position furniture as a homeowner. For example, when you want to add a rug to a room, you might want to know the exact measurement of your room size.
What are the common types of measuring tools?
It is not enough to know only one tool that you can use to take a measurement. It would be best if you all the options, what tool will work best for you, and to also know how to use each tool properly and perfectly like a professional.
Folding ruler: A ruler can be folded together quickly and can be used in narrower spaces. Typically, a ruler is often divided into 150mm or 6", 200 mm or 8" or 250mm or 10". And typically marked with imperial or metric measurements, or it can be both. This is ideal for measuring small spaced and longer distances, including the difficult points to reach. And is more accurate for smaller measurements compared to using a tape measure.
Hold the first segment on top of the ruler and pivot it 180 degrees. If the ruler does not have a lock, hold it tightly and carefully align the second segment of it. From that second segment, pivot the ruler 180 degrees one more time. Now, the ruler has nearly three times the size of the first individual segment. You should continue laying and extending each segment until you reach the length required to take your measurement.
Tip: Note that you should lay or extend each segment carefully for an accurate measurement.
Tape measure: When using a tape measure, you must know the parts first for an effective result of your measurements.
The housing: It is the metal or plastic that holds the tape.
The tang: This is the clip you will find at the end of the tape. It is either in clip or hook, and when reading measurement, the tang indicates zero, but it has movement to make up for the thickness of the tang for when you do hock measurements.
The lock: This is the button found on the tape measure's housing that locks the tape when it is pressed. It is used to prevent the tape from moving.
The blade: This is the technical term for the tape itself.
To start measuring using a tape measure, you must pull the tang out from its housing and place its clip or hook at the edge of the material you want to measure. Stretch the blade or tape until it reaches your desired measurement of the object. Press the lock button on the housing and read the measurement.
Tip: Note that the lock is essential to keep the accuracy of your measurements.
Digital laser measure: This tool is one of the fastest and efficient measuring devices you might want to use. However, you should know that taking successful and accurate measurements starts with aiming at a solid target.
To use the digital laser measure, you should be on the starting point and aim the device on what you want to measure. Turn the device on and let it cycle until it is ready. When it is ready, hit the measure button and wait for the device to find the distance.
Tip: Note that it would be best to have a specific target when aiming a laser tape measure. With no physical points, you cannot take a measurement. For example, you want to measure the distance in the middle of your room. You can place a chair on both endpoints to get an accurate measurement—likewise, practice putting the device on the object for a stable aiming rather than holding it by hand.
Levels: A level is typically used to specify how parallel or perpendicular a surface is. The vials at a level are yellow-green containing additives for UV protection and provide quality performance at different temperatures.
To start using a level, you need to locate the bottom of it. Make sure that it rests against the surface you want to level. You should look at the vials located at the center to find the horizontal level. Moreover, look at the vials on both ends to find the vertical level.
Tip: Not all levels are the same, and you should be aware that they come in different sizes. You should also check for grabbing points on the body of the level, don’t block the vials with your hands when reading the results.
Laser levels- This is a type of tool that can save much of your time and effort. But how do you use a laser level?
First, you need to set up the level either on a stand, on the ground, or attached to a wall. After ensuring that it will not be moved or altered, you can start leveling with the device. It is time to turn on the laser, position it, and project it on the surface you want to level. Check that it is leveled and do not forget to mark off its point when you are finally sure that it is stable.
Tip: The key to taking accurate and successful measurements using a laser level is the device's stability and ensuring the exact and absolute level points that you need. Likewise, builders use a green laser level for a brighter display and a crisper level line while taking measurements.
Dumpy level: This is a leveling instrument with a telescope tube with two collars fixed to a stage by a vertical spindle. The telescope can only be rotated in a horizontal plane.
When using a dumpy level, you will also need a tripod and an E meter. The tripod will hold the measuring device on top. Make sure that the tripod is in a balanced position by pressing its legs into the ground for stability. Look through the telescope and make sure that an assistant is there to hold the E-meter vertical to the under measurement point. The measurement typically starts from the benchmark with its known height or called a datum point by builders.
Tip: For the device to work correctly, the dumpy level must be entirely level and horizontal. You want to use the leveling screws to set the device perfectly level.
With the above tools and guides, you should know how to level and measure like a builder even as a DIY’er or homeowner any time!