Google+

contact us

Use the form on the right to contact us.

Day or Night, we are here to serve you. Leave your plumbing problem to us.


Tinley Park, IL

(708)845-7922

Residential and Commercial plumbers and plumbing contractors available in Orland Park, Tinley Park, Oak Lawn, Palos Heights, Midlothian, Oak Forest, Homer Glen, Mokena, Frankfort, and the surrounding Chicago South Suburbs. Emergency plumbers.

copper water lines.jpg

Kevin Szabo Jr Plumbing Blog

Kevin Szabo Jr Plumbing is Tinley Park, Orland Park, Oak Forest, Midlothian, Orland Hill, Homer Glen, Mokena, Frankfort, Crestwood, Palos Heights, Oak Lawn, local plumber. Read our blog for advice, tips, a good laugh, and basic home improvement.

**We are moving our old blog to our new and improved website. Too see all our posts visit kevinszabojrplumbing.blogspot.com

Filtering by Category: October 2020

Five Things To Keep In Mind Before Going For Roof Restoration

RH Business Marketing Solutions

1*9soYQArFaX2ZUjT8hAF2WA.jpeg

When you are going for roof restoration, the first and foremost thing you need is the knowledge to understand that there is some problem with your roof. Keep in mind that a simple visual inspection can reveal your roof problems even though the fixture might look okay from the outside. At Benchmark roofing and restoration, you will have access to the best experts and experienced workforce to inspect, judge the problem, and fix roof restoration and rebuild issues.  

Getting professionals to do the job for your is the best idea. However, if you are looking for some ideas and tips that will enable you to choose the right service, here are some points for you to go through. Read on.

1. Shop around for the best deals

Since roof restoration is a tricky business, most homeowners tend to accept the first service that comes their way. But you need to keep in mind that if you are looking for the best deal, you need to shop around and look at quotes from at least three different service providers. It is also essential to understand that you need to balance the quality of the work and the project's expenses. Therefore, take a hard look at the experience, expertise, and user reviews of service before signing on the dotted line.

2. The inspection is a must

You need to ensure that the experts perform the inspection thoroughly. Keep in mind that the advice and the quotation can only be precisely ascertained after a thorough inspection. Most professional services will ensure the inspection before the quotation, so ensure that the service you use is an expert one while doing the negotiations.

3. The importance of the written quote

A full and comprehensive written quotation is essential before any roof restoration work. After you have found a firm that you are happy to work with, always ask for a written and comprehensive quotation for the project. This will ensure that there are no hidden charges for the project that can be an unwelcome surprise once the work completes.

4. Communicate with the contractor

Communication is the key to building fruitful relationships with contractors and roofers. You need to state clearly the problems you are facing and make sure that the tradesman guides you through the entire process of the restoration, the time-duration, and the cost. You can raise all your concerns before the commencement of the project.

5. Enquire at the local council

Depending on your local, state, and federal laws, you might require to apply for permits for any roof restoration or construction work. Therefore, it is vital to double-check all the rules and apply for the permits before beginning any construction work.

When you are looking to go for roof restoration and looking to get it done smoothly, you need to stick to the five tips mentioned in the previous section. Research about the local contractors in and around your area, like flat roof repair baltimore, and call up to get an appointment. All the best!


Guest Contributor: Sujain Thomas

Secure Plumbing Before You Travel

RH Business Marketing Solutions

Screen Shot 2020-10-28 at 12.11.48 PM.png

Before going out of town, you'll want to make sure your house's plumbing is secure. Preventing water damage is infinitely easier than repairing it. As 45% of all property damage is caused by water, making sure the pipes are safe is one of the best ways to remain worry-free while traveling.

Here are some of our top tips to secure your plumbing before leaving for a vacation.

Check the heater

As a water heater holds tens of gallons of water, it can cause massive damage if it breaks. Check the heater for any leaks or water damage to the pipes. Additionally, turn off the heater or put it on the lowest setting to conserve electricity while away.

Inspect the appliances

As with the heater, make sure that all water-using appliances are secured. Washing machines and dishwashers are a priority, but the same can apply to a refrigerator with an ice maker. Supply hoses might be challenging to reach, but making sure they're tight and leak-proof is better than finding your floor flooded.

As an additional precaution, consider replacing traditional rubber hoses with burst-proof options. While rubber or plastic can stiffen and leak, especially if the area has hard water in the supply, steel can take more stress and still perform well.

Test your sump pump

A sump pump system makes sure the basement doesn't flood with groundwater. Before a trip:

  1. Test the sump pump by pouring water in the pit and making sure it's pumped out properly.

  2. If it's not, make sure the pump is plugged in and check its breaker too.

  3. Ensure the outlet pipe isn't clogged as that will prevent the water from dispersing.

Shut off the water supply

If you're going away on an extended vacation, shut off the house's primary water supply. Old valves can break or get stuck. If the main valve is stuck, don't force it. Call a plumber to replace it at the earliest convenience.

If you can't or don't want to shut off the main supply, close the valves to the toilets and the appliances directly. Typically, these are small valves in the bathroom, toilet, or kitchen that you turn to shut off the water. While shutting off the supply to the appliances and toilets still leaves water in the main pipes, those are more resistant to damage and should cause fewer concerns.

When you return, be sure to turn on the valves slowly and not overwhelm the systems. A sudden increase in water pressure can be devastating to older pipes.

Frost-proofing the faucets

If you're worried about freaky weather conditions causing pipes and faucets to freeze over, there are frost-proof options available for outdoor faucets. When the temperature gets below freezing (as rare as that might be), the outdoor faucets are the ones most likely to burst, so make sure to prepare adequately.

Monitor the water supply

These days, there are many tools available to make sure your plumbing is secure. Water flow sensors can be installed on the main water line to monitor for unusual output and automatically shut off the supply. Many newer models come with additional options and Wi-Fi connectivity and can remotely notify you about any issues. Additionally, leak sensors can detect water, so installing them near appliances can minimize damage and prevent further collapse.

Summary

Overall, it's essential to check your plumbing before leaving for a trip. Precautions can be time-consuming and costly, but they are ultimately money-saving measures that prevent significant water damage to the house or check this great vacation spot: Hilton Head Vacation Rentals. For that reason, it's well worth the time and money to make sure everything is under control before leaving the house for extended periods.

Guest Contributor: Richa Khandelwal

The Ultimate Maintenance Checklist for an Old House

RH Business Marketing Solutions

HouseCalls_Missouri_Troesser_Exterior.jpg

If your home is more than 50 years old, you may consider it a quirky relic. However, as charming as crown molding, arched doorways and stained glass windows can be, buying an older house comes with its own unique set of challenges. These properties require a bit more maintenance than a turn-of-the-century suburban residence. 

1. Insulate the Attic 

Attic insulation can deteriorate in old houses, causing gaps and drafts. In colder climates, this can result in increased energy usage and costly heating payments. You can easily resolve the issue by applying a new layer of insulation. Use canned spray foam around the casing and weatherstripping to seal gaps around pipes with fire-blocking caulk. 

2. Protect Against Drafts 

You might also protect the rest of the home from drafts and seal the building envelope by weatherproofing doors and windows. Apply caulk around window panes, the junctures of walls and ceilings, and around baseboards. For gaps more than one-quarter-inch wide, insert a piece of foam backer rod before covering with caulk. 

3. Look for Exposed Pipes

It's wise to inspect an old home's pipes, especially before the winter cold sets in. If there are leaks, be sure to call a plumber as soon as possible. Moreover, you should take care to wrap metal pipes in foam-rubber insulation. This step is especially important for protecting lines that may run through walls or the foundation, as they may be more likely to freeze and burst. 

4. Examine the Roof

Before it gets too chilly, climb up on the roof and give it a thorough inspection. Look for holes, loose shingles, crumbling pieces and cracks along seams. Shingles fall off old houses more easily, especially in harsh weather. Check asphalt for blistering and wood for rot, mold and splits, and make repairs before the first snowfall. Furthermore, be sure to clear the roof of debris and remove dirt, dead leaves and clogs from gutters to prevent ice damming.

5. Inspect Electrical Systems

Old homes are notorious for poor wiring and shoddy electrical work. Plus, additional outlets and appliances tend to put even more stress on already failing systems. Maintain and care for your electrical system by looking for scorch marks around breakers, fuses and outlets. Make sure they work and inspect outlet receptacles, replacing any that may be broken or loose. 

6. Landscape 

Last — but certainly not least — you must prioritize landscaping if you wish to maintain your old home. Could you add this line: Depending on if there's been any neglect, hiring a lawn care service like TruGreen in Illinois may be the right move to handle fertilization, aeration, overseeding and weed control. Remove low-hanging branches from trees, install an irrigation system to care for the lawn, and consider adding a walkway or garden. Finally, make sure the yard slopes away from the home to prevent flooding, foundational damage and other drainage issues. 

Preserving Character

Maintaining and preserving an old home takes a lot of hard work, not to mention a large budget. However, most of these houses are worth some extra care and attention. With frequent inspections and a little elbow grease, you can preserve the features that have given your residence character for decades. You just have to be willing to commit. 

Guest Contributor: Rose Morrison

How To Install A Sump Pump In A Crawl Space?

RH Business Marketing Solutions

It’s common to see moisture and pooling water in a crawl space. Over time, you will see mold buildup, which is the last thing you would want to see. If you want to keep your crawl space dry, this first line of defense is adding a sump pump.

Crawl spaces get wet and dry throughout the season. This is normal. However, what’s not normal is letting water in that place in the first place. There are three ways water can get in your crawl space.

First, surface water and get through window wells, leaky basement windows, and also from roof drainage. It can also be due to grading issues and overflowing gutters. Another cause of water in that space is groundwater.

Whatever the reason may be, putting in a sump pump is the only solution. In this article, I’m going to show you how to install a sump pump in a dirt crawl space in the easiest way possible. 

Sump Pump Installation Crawl Space

There are two ways you can go about this. You can hire an expert to install a sump pump in crawl space, or you can try adding a sump pump to crawl space on your own. 

If you decide to go with the DIY method, here are the steps for installing a sump pump in crawl space. Now, keep in mind that any regular sump pump will do. There is no difference between a crawl space sump pump and a regular sump pump.

Step 1 – Sump Pump Setup Planning

Planning is the first step when installing a crawl space sump pump system. Locate a suitable spot for the sump pump basin. Make sure it is near a power outlet if there are none, wire one near the pump. 

Next, plan where you will place the sump basin outer pipe. This is the pipe that is going to carry sump water outside. Also, plan where you will want to drill a hole for the pipe. 

Step 2 - Digging A Sump Pit

For this step, make sure you have all the proper tools for digging out crawl space. After that, lay out the plan and start digging. Start by digging a hole for the sump basin. Then for the pit for the drainage pipe. 

If this is done by an expert, you won’t have to do anything. Just sit there and watch. However, if you are doing this by yourself, make sure to consult a professional or an engineer so that you don’t mess up your home. 

Step 3 - Sump Basin Installation

This is a long process, and you can find a bunch of YouTube videos out there that will show you how you can install a sump basin. Once you are done, go to the next step. 

Step 4 - Sump Pump Setup

Now put the sump pump into the basin and connect all the pipes and cables. On a side note, make sure to weep a small hole in the PVC pipe. This will prevent air block and allow for better water transportation. 

Step 5 – Finishing Up

Once you have installed your sump pump, it’s time to cover and connect. Place the cover over the sump pump and place it properly. Connect the discharge line properly and keep the area ventilated properly as per building code.

Once you are done with the sump pump, it’s time to finish up the crawl space. Put some gravel where you have installed the new pump and spread them evenly. After that, finish up the work that’s left i.e. drainage line out. 

Final Thoughts

Although a crawl space is small, there are still enough spaces for you to install a sump pump. Make sure to test the sump pump before you leave it there.  

Guest Contributor: Juan Williams

Recognizing Different Types of Water Damage

RH Business Marketing Solutions

water-damage-drywall-replacement.jpg

Advice from Water Damage Restoration Service Experts

When you uncover water damage in your home or office, it can lead to an immediate sense of panic. You may be asking yourself: Where is the source of the water damage? Who should I call for water restoration services? Is this creating a harmful environment for my family or employees? The Institution of Inspection, Cleaning and Restoration Certification (IICRC) has designated three types of water damage: clean water damage, grey water damage, and black water damage. It’s essential to understand the differences between each category, as it can impact your health and safety. Learn more about these categories and what you should do if you experience water damage in your home.

Category 1 - Clean Water

Category 1, or clean water, is generally harmless to your health. Clean water is significant because it doesn’t contain waste, bacteria, or other hazardous chemicals. That doesn’t mean you should be lax about your water restoration efforts. Some examples of category 1 causes include small amounts of rainwater, leaking faucets and pipes, overflowing bathtubs, and other appliances. If left untreated, category 1 water damage can still cause thousands of dollars worth of damage to your home or office and develop into category 2.

What Should I Do in the Event of a Category 1?

Category 1 includes a wide range of scenarios, from small leaks and minor water damage to water main breaks. It’s really up to the home or business owner to decide if they have the resources and tools to clean and dry the area properly. If clean water cleanup is handled incorrectly, it can lead to persistent moisture and the presence of mold, which is an even bigger issue for home and business owners.

Category 2 – Grey Water

Grey water is defined as water with small amounts of contaminants, but that doesn’t make it any less detrimental to your health. Ingesting sullage can cause illness. Some common grey water sources include equipment discharges, an overflowing water fixture, and specific weather events. If left unattended for more than 48 hours, it should be treated as black water or category 3.

Keep Your Property Safe from Grey Water

Most home and business owners are not adequately equipped to handle a category 2 water restoration project. With the presence of microbes and other contaminants, grey water poses a substantial health risk if an individual is not adequately equipped or inadvertently exposed. Improperly cleaning a category 2 will create a dangerous environment that impacts the health of your employees and family members. Protect your property with category 2 water restoration services by expert contractors.

Category 3 – Black Water

Black water is considered the most dangerous category in the IICRC system. It contains grease, urine, oil, or feces and poses a hazardous health risk to building occupants. The contamination could lead to minor illness or hospitalization, depending on the individuals exposure level. Not only that, category 3 can severely damage your property. It’s important to note that while we may refer to category 3 as black water, the water may not necessarily appear black. The coloration doesn’t make it more or less dangerous. This uncertainty is why it’s important to have a trained professional inspect your property after a flood.

Why You Should Choose a Professional for Black Water

In the event of category 3 water damage, we highly recommend seeking professional help for your water restoration needs. To properly clean this type of water damage, it requires specific protective gear to keep the cleaner safe. Specialized tools and cleaning protocol will also need to be followed to ensure that no contaminates are left behind. Category 3 water damage poses a significant risk to you and your family or employees’ health. It can lead to numerous diseases, including fever, severe dehydration, hepatitis, cryptosporidiosis, or gastroenteritis. Limit your expose your exposure to black water and contact an expert.

Get the Best Water Restoration Services

DKI contractors provide comprehensive water restoration services for clear water, grey water, and black water damages nationwide. You can count on our team to provide you with a detailed and thorough inspection of your property. We also offer 24/7 emergency service that is fast and reliable. Our water restoration technicians are highly trained to provide you with the best care available in the industry. If you’re in need of water restoration services, regardless of the project’s scope, you can feel confident our team has the tools and technology to handle it. We have helped many businesses and homeowners protect their property and those that occupy it with quality restoration services. Schedule your estimate today.

Guest Contributor: Maria Williams

10 Best Effectual Home Desk Organization Ideas: Plan, Declutter, and Rearrange

RH Business Marketing Solutions

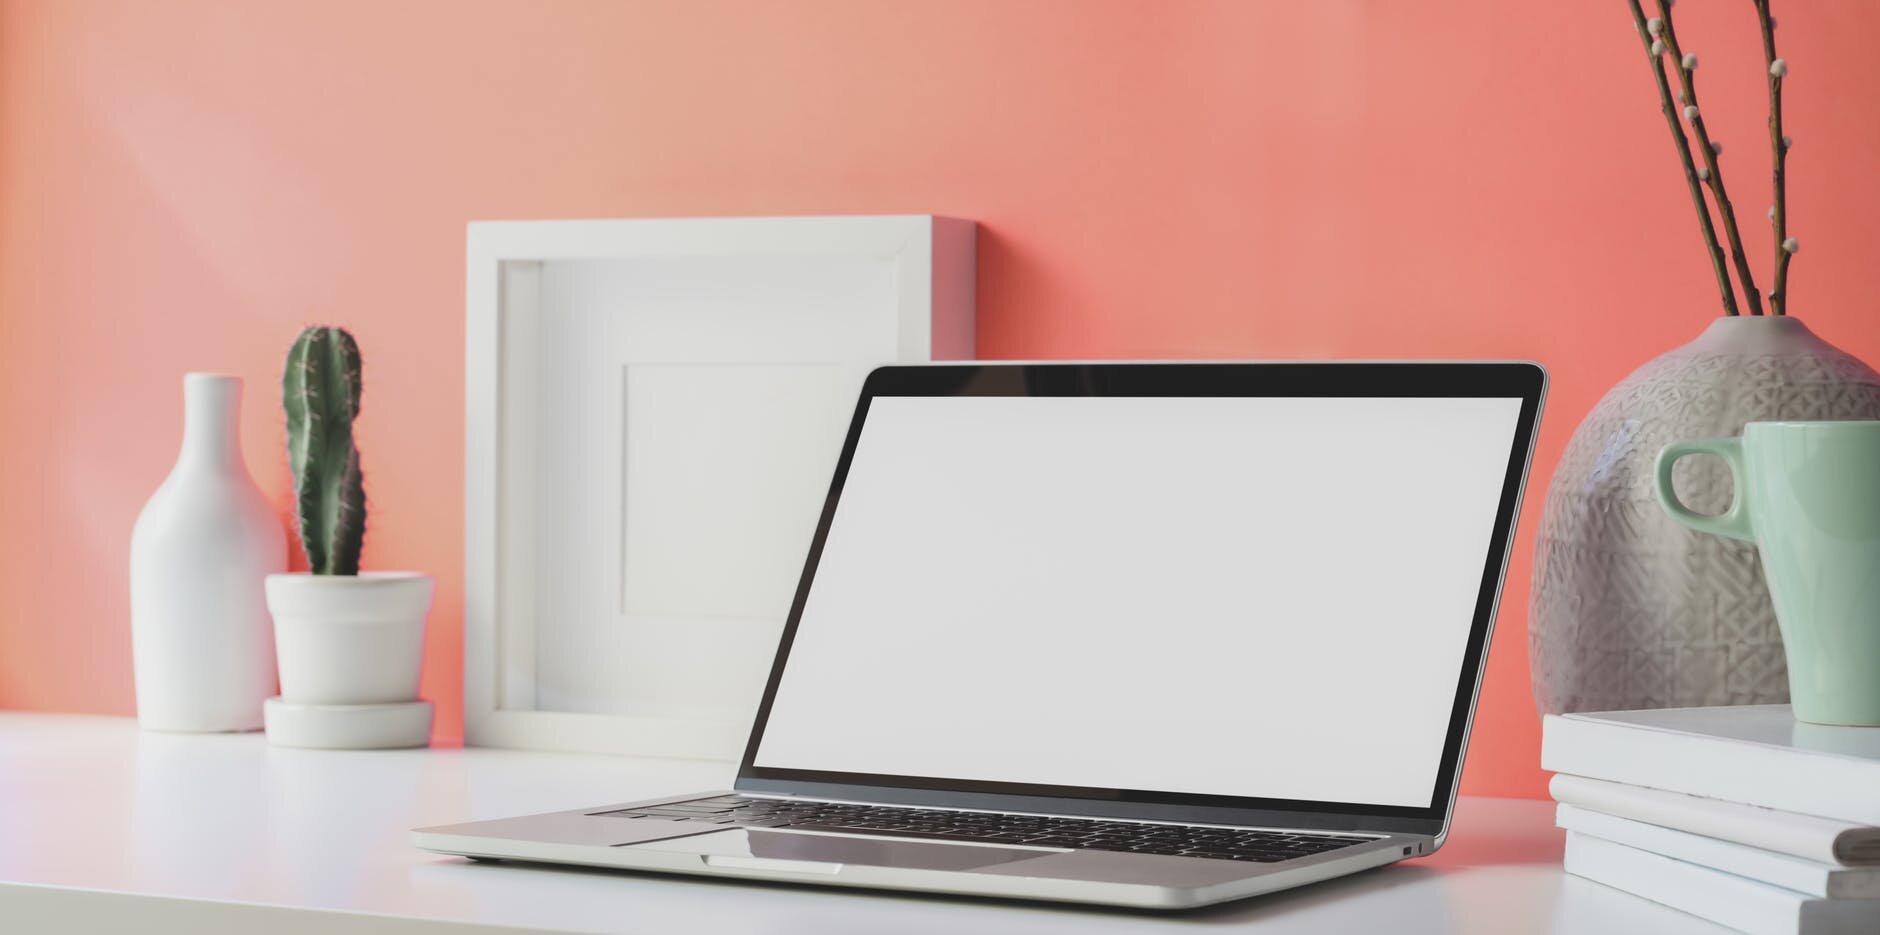
Undoubtedly, an organized and clean home desk is the prime reason behind the increase in optimum productivity. Generally, working from home can be a tedious job if the home office desk is not adequately organized. Moreover, we know about the common phrase “tidy office, tidy mind”, and this term seems to be true. 

Performing the essential official works or creating an important school project tends to get difficult when the home desk is contaminated with dirt, grime, and other non-essential things. So, with an immaculate and polished home desk, you can only focus on meeting the tight deadlines. Additionally, once you reorganize the desk, it will be even beneficial for alleviating the excessive stress burden. 

So, you have to be extremely attentive to prevent the clutter from building up on the home office desk. Specifically, keep everything in one place and maintain a rigorous organizational system before you opt for working. Whether it’s a writing desk or corner desk, certain specific ways can be implemented to organize it. 

Moreover, it just takes a minimal amount of time to declutter the different types of desks, irrespective of its size. So, simply check these super flexible desk organization ideas to stay stress-free and well-organized life. 

Importance of Organising the Home Desk Regularly

Usually, we need numerous important things including papers, documents, books, pens, and other essentials on a daily basis. With time, items keep on adding to the home desks. So, sometimes, it gets unmanageable to find the required item, especially when the desk contains too many paper pile sections or containers. 

And, as a result, you might be unable to find the important office file within the right time. Moreover, you might even encounter severe health problems because of dust and debris accumulation. Cleaning is necessary for every aspect- be it enhancing the hygiene level or eliminating the germs. 

So, simply get in touch with ATDOORSTEP and get prompt and effective cleaning and decluttering solutions from the top-ranked professionals. 

Desk Organizing Ideas that Needs to be Consider

Owing to the busy-life schedule, we hardly get adequate time to rearrange the drawers or shelves. But anyway, you have to make it clutter-free to avoid unnecessary hurdles. So, here are some simple yet effective ways to organize your workspace. 

With these extensive DIY home desk organizing ideas, you will exactly find the things that you need within a minimal time. So, let’s get started!

1. Opt for Cleaning the Desk

Is your home desk filled with stacks of papers or piles of office documents? Do you clean the home desk? If not, then you should definitely start with cleaning the desk in the first place. Because, with time, dirt and dust get accumulated on the home desk, especially in the dusty-humid surroundings. Thus, it becomes crucial to clean the home desk, at least once a week. The sole purpose of cleaning the workspace is to get rid of clutter.

Remove everything from the desk including the laptops, printer, phones, or other electronic devices before starting the cleaning procedure. Even, you can avail the opportunity to use a vacuum cleaner to put an end to the dust problems. 

Now, it's time to clean the essential items that mainly remain on the desk. Consider cleaning these items at least once a month. Once you accomplish the cleaning procedure, relocating the necessary items will become much easier. 

2. Declutter the Paper Files

Do you have a bunch of paper files? Well, then you first need to organize those large numbers of paper files. Organizing the paper files can be done with great ease. Get control of the clutter before the entire scenario gets worse. Go through every single paper and then mark the important paperwork using a color-coded filing system.

3. Install a Shelf over the Desk

Now, expanding the workspace can be extensively done by just installing a shelf. Simply, engage with ATDOORSTEP to get devoted professionals who can efficiently install a multi-functional shelf. After the accomplishment of the home desk installation process, put aside the important books or extra tech items. Place those items on the shelf to keep the desk clutter-free. Also, putting up a decorative shelf is a great initiative to add value to your home. 

4. Start Using a Mail Station 

Have you thought about taking a mail station? If not, then it’s time to use one of those. Because, to put control over the paper stacks, a mail station is quite needed. The homeowners must make a separate folder for the outgoing and incoming mails, and bills. As soon as you get the mail, file it in the mail station, that’s it! This is the only way to get your required mail files on time. 

5. Accumulate the Desk Accessories

You will feel a lot better and get a positive affirmation about your work with an organized home office desk. So, you need to divide the desk accessories into different segments. Also, keep only the visually-pleasing accessories and those items that mainly serve a practical purpose. Consider using a cup for putting up the pens, and a charging station to power up the smartphones. 

6. Consider Making a Printing Station

A printing station will be highly beneficial to keep the printing supplies in a proper place, especially when you have a wireless printer. You can even keep this sort of printer inside the printing station for easy accessibility and convenience. 

7. Opt for Obtaining a Container

With the help of a colorful container, storing all the essential desk items has become easier. Moreover, you can put all the office supplies not only in the container but also consider keeping it inside the drawers, baskets, or bins, Placing all these items will provide your home desk a decluttered appearance.

8. Provide a Separate Spot for the Magazines

The magazines, official files, books, and other random pieces of paper can come together and create a messy situation. This is the prime reason why you should keep these items in a separate place. Get a built-in-shelving for keeping the magazines and other books, that will be just more enough!

9. It’s time to Install a Cabinet

Every homeowner should consider bringing a cabinet that fits their budget. It will help you to improve the condition of the home desk. In the heap of office files, magazines, notepads, you might lose some or other important documents. So, get a cabinet now with the assistance of professionals

10.Use Paper Binders 

Now, it's high time to think about using a binder to organize important papers. And, in case of emergency, locating the important documents can be done in a much flexible way. So, keep the medical documents in one spot, the pet medical records, and other manuals in the other, that’s it. 

Relocating Was Never this Easier!

To declutter the home desk, it is first important to acknowledge the overall space of the desk. That is the prime criterion that you should always look out for. Also, avoid exaggerating the home desk with unnecessary items. Moreover, if you are seeking professional help in reassembling the desk items, go grab it now!

Guest Contributor: Smith Jhons

HVAC Trends: The Underground Installation

RH Business Marketing Solutions

HVAC-Pandemic-Service.jpg

You can find different HVAC trends available on the internet anytime. As you know, some of these are finding alternative energy methods from various elements. Aside from convenience, it is also a cheaper way of creating energy for your HVAC system. To name a few, some are using water for hydroelectricity. Meanwhile, solar energy from the sun is also quite popular for the past years. However, one of the latest trends could be extracting energy from the ground to heat or cool an area. This is by using a geothermal energy heat pump or GHP.

Why do you need a GHP installation?

Indeed, GHP is now the latest trend in HVAC. However, is it worth it to use this method of collecting energy? The answer would be yes.

There are a lot of disadvantages when you use elements as your energy exchange source. For example, hydroelectricity would not be beneficial if you do not have an abundant source of water. Thus, it is not ideal for buildings around the city. Meanwhile, solar energy is not the perfect choice if you live in a colder area with less sun exposure. However, these will not be a problem for the underground installation of GHP. 

Even in winter, GHP can work well on supplying energy for your HVAC system. The fluid (water or antifreeze solution) in pipes will collect heat from the earth. It will then bring it through the system and straight into the facility. After that, an indoor unit will compress the heat, concentrate it, and release it into a warmer aid. Meanwhile, an opposite cycle happens in the summer. The HVAC system will pull the building heat out and transfer it into the heat pump. From then on, the earth will accept the heat back. It is also very convenient as the only electricity you would use is for operating the pumps. To make facilitation easier, it is also best to install HVAC access doors that will help maintain the system.

Types of Geothermal HVAC

There are three main parts of the GHP, and these are the heat pump unit, the ductwork, and the loop. Depending on the building's location, you can choose different loop systems to work correctly for your HVAC system. You must also remember that the cost, stable conditions, and climate can impact the way your GHP will do. Here are some of the geothermal HVAC that you can choose from:

geothermal-heating-construction.jpg

Closed-loop horizontal

If you are looking for a cost-effective system a closed-loop horizontal system would be your first choice. This is also best for residential buildings. It will trench up to three feet deep below the ground with a parallel set of pipes. When buying the right type of line, make sure to choose high-density polybutylene or polyethylene. Trenches at least three feet deep are dug, and a series of parallel pipes are set. To make it more workable, you can coil the line to assist horizontal installation. 

 Closed-loop vertical

Is your next project a school or commercial building? If yes, then a closed-loop vertical HVAC is for you. In this system, you will bore foud-inch diameter holes, which are 20' apart from each other. Right then, you will insert a pipe to each hole and connect them by thermal fusion. The horizontal lines are what we call manifold and this curry fluid to the heat exchanger, vice-versa. The loops you will use tend to be more expensive, but the installation is relatively cheaper. You should also install HVAC access doors to make the maintenance much more comfortable.


Open-loop

For the most straightforward way of installation, an open-loop system would be the first in the list. However, this is not convenient in cities as it requires the use of any surface body water to function. Groundwater would be its heat exchange fluid. It will go directly on the GHP, and the water will return to the ground through another body of water. Thus, there should be enough clean water to make this work. 

To make your GHP systems more convenient to use, do not forget to use HVAC access doors. This helps not only in maintenance but also for your access to different methods of your building. Visit Access Doors and Panels now for more information. Call us at 1-800-609-2917 now!

Guest Contributor: Chris Jackson

5 TIPS TO PREPARE YOUR HOME’S PLUMBING FOR WINTER

RH Business Marketing Solutions

It’s tough to accept it, but it’s true: summer is behind us and the colder months are rolling in. When winter comes, you have a new pile of problems on your plate: changing your car tires, upgrading your jacket, and remembering to bring your hat and gloves everywhere. One thing that you shouldn’t forget about is preparing your plumbing for this chilly season—otherwise, you might have to deal with a burst pipe, costing you hundreds or even thousands of dollars. You want to avoid this worst-case scenario, but you can’t control the weather. What you can control is how well-protected your plumbing and HVAC system is against the cold. Follow these five steps to winterize your home:

1.Schedule a furnace inspection. What’s the number one way to keep your plumbing safe? By heating your home with a high-efficiency furnace. If your house is cold, then your pipes will be too. Your plumbing system relies on a well-heated house to function properly. Paying for semi-annual maintenance of your HVAC system is much less expensive than a repair or replacement. Many homeowners turn down their heaters to save money on bills, but consider this: keeping your home toasty will protect your plumbing and be more comfortable. Replace the filters and schedule repairs for any issues that arise. If your home is too chilly, you might be stuck repairing a burst pipe. 

2. Don’t go on vacation before protecting your plumbing system. You’ve had a stressful year, and you’re ready to take a vacation and leave your home behind. Just keep in mind these tips, which will keep your plumbing safe while you’re away. It’s recommended that you find the main service valve and shut the water off. This will prevent major damage from occurring if a pipe freezes. Then, allow water to drain from the taps by opening them. Finally, don’t leave behind any unresolved issues, or you may come home to a disaster. Be aware of signs your septic tank needs cleaning—every homeowner’s worst nightmare is a backed-up sewer drain. If you’re away from home, who will be there to call a plumber when an emergency occurs? You can ask a neighbor or family member to inspect your home every few days to make sure no problems arise. Taking the time to protect your home from winter’s wrath will allow you to fully enjoy your vacation. 

3. Maintain your water heater. What’s more relieving than a hot shower or bath on a cold winter day? To enjoy this heavenly experience, you’ll need a water heater that’s in prime condition. After all, what’s the point of efficient plumbing if you don’t have hot water to run through the pipes? Get your water heater inspected before the outdoor temperatures plummet—it’s best to catch a plumber in their off-season, as they’ll be less busy. A professional can drain your water heater to clear out debris, minerals, and other sediments; this keeps your tank in top shape. On that note, fix any leaking faucets! Leakage wastes gallons of water each year, which will cost you money and waste a valuable resource.

4. Insulate your pipes. Just as we wear extra layers of clothing in the winter, your pipes need additional insulation to withstand the cold. They contain water that freezes easily in frigid temperatures; this will create intense pressure which makes pipes burst open. Visit your local hardware store and purchase foam insulation for pipe covers—they’re like parkas for your plumbing. Don’t forget about pipes in unheated areas, like sunrooms or basements. It’s a good idea to consider a home plumbing inspection to make sure your pipes can handle the cold weather. A plumber can locate any cracks or faults in your plumbing, and repair them before winter blows in.

5. Watch for exposed outdoor valves. Winterize any outdoor faucets, pipes, and valves so that they aren’t damaged by the cold weather. The grass in your front yard was your pride and joy in the summer, but now it’s completely covered up. There’s no need for sprinklers and water hoses when your lawn is buried beneath snow, so you may consider storing these tools elsewhere—make sure you disconnect and drain hoses from valves to prevent them from cracking. Shut off outdoor water supplies and apply the appropriate insulation. Lingering water in your garden hose can freeze and break it, which will be a problem when it’s time to tend to your lawn next season. Pipes that are outside your home aren’t heated, so it’s crucial to insulate them to protect them from frost. You can buy a hose bib to protect your outdoor systems. 

Winter is a lot more manageable when you’re prepared for it. Even if it’s your favorite season, it’s probably your least favorite when it comes to plumbing issues. Homeowners dread the coming of this cold season not only for its weather, but for the havoc it wreaks on their property. Plumbing is an essential system in your home; by winterizing your pipes and appliances for this season, you’ll be able to enjoy it calmly, with hot chocolate, warm fires, and thick sweaters. 

Guest Contributor: Christie Simon

Everything You Need to Know About LED Lighting

RH Business Marketing Solutions

LED lighting has come a long way in such a short period of time. The man who is recognized for conceiving the light bulb, Thomas Alva Edison, says that he “tested no fewer than 6,000 vegetable growths, and ransacked the world for the most suitable filament material” as part of the process of inventing the light bulb, which got a patent in 1880 (Source). Edison is said to have acknowledged that this was tedious and very demanding work, particularly on those he employed to help him. Having done its work for over 100 years, the bulb, as invented by Edison, is gradually being replaced by a light emitting diode (LED).  

LED light bulbs image. LED bulbs come in a wide variety of shapes and sizes.

LED light bulbs image. LED bulbs come in a wide variety of shapes and sizes.

While LED lighting has been around for some years now, many questions about it still exist. Is it worth changing to LED lights? Are LED lights more expensive? Do they truly last as long as they are said to? Will they save energy? Do they increase the amount of heat in a room? Will they one day completely replace the traditional light bulbs we have known for over a century? In this article, we took some time to answer the most common questions about LED lighting. We start by defining what it is and its technical details, how it differs from other sources of light, how LED light works, and the categories into which it falls. We then look at the cost and efficiency of LED lighting and its advantages and disadvantages. Finally, we look at what the future of LED looks like.

Images of LED semiconductor chips. “LED” stands for Light Emitting Diode.

Images of LED semiconductor chips. “LED” stands for Light Emitting Diode.

What are LED Lights? 

An LED is a semiconductor light source that produces light when triggered by an electronic current. A semiconductor is a solid substance whose ability to conduct electric current ranges between that of most metals and an insulator.

Energystar.gov, the US government-backed organization that provides information to businesses and consumers about energy issues, explains how LED technology works. It says, “An electrical current passes through a microchip, which illuminates the tiny light sources we call LEDs, and the result is visible light.”   

How LED Lighting Differs from Other Sources of Light 

LED lighting differs from other lighting sources, such as incandescent light bulbs, in several ways. Incandescent bulbs have filaments that glow, producing both light and heat when electricity flows through them. On the other hand, LEDs’ energy is released in the form of electrons (tiny particles that carry electricity in solids) that flow to create photons (visible light). Notably, LED lights emit very little heat. 

Unlike other forms of lighting, like incandescent bulbs, which emit light and heat in all directions, a single LED chip emits light in a specific direction, eliminating the need for reflectors and diffusers, which can trap the light (Source). LEDs also differ from the light bulbs we have known for many years in that they last much longer.

Types of LED Lights

Different kinds of LED lights have been created over the years. Let’s look at some of them below:

Miniature LEDs: Are extremely small and come in a single color or shape. You will see this LED in remote controls, calculators, and mobile phones used as indicators.

Dimmable LEDs: Work by creating a dimming effect. You will find this type of light used for creating a unique setting, such as in bedrooms, where someone may need to create a romantic setting, or the cabin of a plane seeking to replicate different times of the day.

High Power LEDs: Deliver higher levels of brightness as a result of several improvements that have been made to LED technology.

Lighting LEDs: Are the light bulbs found in the home and often take the shape of the traditional Edison light bulb that has been in use for many years.

Flashing LEDs: These are used in places where the idea is to attract attention, such as in storefront signage, other kinds of displays at exhibitions, and automobile indicators and lighting.  

An image of LED bulbs. When choosing LEDs look to lumens, not watts used.

An image of LED bulbs. When choosing LEDs look to lumens, not watts used.

LED Lighting Technical Details 

The technical specifications of LEDs deliver crucial information that can help users use LEDs as efficiently as possible, and ensure they last as long as they are designed to. Here are some of the basic technical concepts about LEDs that you need to know:

Lumens Instead of Watts

Instead of using the watts that we are used to when determining how bright a light source will be, LED uses lumens. A high lumen value denotes a higher brightness from the light. Generally, 1-watt in an incandescent lamp corresponds to about 9 lumens in an LED light.

LED Color Rendering Index

According to the publication devoted to all things LED, Ledsmagazine.com, one of the crucial specifications when using LED lighting is the color rendering index (CRI). The CRI gives an idea of how accurately the colors of the objects in a room will be produced by the color radiating from an LED lamp compared to a natural light source.

To understand CRI, you may need to start by noting that a tungsten halogen lamp has a CRI of around 100. Ledsmagazine.com reports that “blue chips plus phosphors are now achieving CRI of approximately 80.” It also notes that even though higher CRI is possible, it may come at the expense of efficiency. Anything below a CRI of 80 will start to lose accuracy in depicting the color of objects in a given space. 

A photo of a living room with LED lighting.

A photo of a living room with LED lighting.

LED Lights Uses 

Look at the advertisements from many automobile manufactures and makers of electronic devices today, and you will see that LED lighting is used as a draw card. Because of the advantages presented by LED lighting, its application can now be found in almost every sphere of human life.

LEDs are used for backlighting devices like modern televisions and smartphones. For televisions, they are generally perceived to save power. Their widespread use in cellphones and other mobile devices seeks to preserve battery life. Also, because of their lower power consumption, LEDs are becoming common in areas like road signage and billboards. In the automobile industry, clear visibility is leading to the growing adoption of LEDs. However, there have been some complaints that LED lighting on roads could be dangerous when it becomes too bright.  

LED Lighting Products’ Lifetime

Energystar.gov reports that LEDs “typically do not ‘burn out’ or fail. Instead, they experience ‘lumen depreciation,’ wherein the brightness of the LED dims slowly over time” (Source).

LEDs can last two to four times as long as other traditional bulbs. The lifespan measurement is usually expressed as B50-L70, which can be interpreted as the time when 50% of the LED bulbs in ideal conditions will have 70% of their rated output.

Going by that, B50-L70 of such LEDs ends somewhere between 10,000-50,000 hours. However, it’s important to acknowledge that factors such as material defects, electrical overstress, and heat stress may cause a large discrepancy in LEDs’ life expectancy.

Cost of LED Lighting 

When switching to LED, the initial cost will be higher as compared to other lighting technologies. However, when you look at the savings associated with an LED lamp’s lifecycle, you’ll end up saving a lot. These bulbs have both longer life expectancy and energy-saving capabilities, hence reducing running costs (Source).

LED Lighting Efficiency

The most significant advantage of LED lights is their energy efficiency, and how they require much less wattage to power than other traditional sources. Some sources claim that LED lights use up to 90% less energy than other lighting sources. 

LEDs and Heat

One of the central claims made about LED lighting is that it produces less heat. This is a view supported by academic sources that note that LEDs produce little infrared light and close to zero UV emissions (Source). Energystar.gov also notes that “Thermal management is generally the single most important factor in the successful performance of an LED over its lifetime” (Source).

Home electrical meters image. Using LEDs can lower your electrical bills and energy usage.

Home electrical meters image. Using LEDs can lower your electrical bills and energy usage.

Advantages and Disadvantages of LED Lighting

Like all technologies, LED lighting comes with its advantages and disadvantages. However, as you will see from the points below, the advantages far outweigh the disadvantages. 

Advantages 

  • Have a relatively long-life expectancy as compared to other lighting sources (Source).

  • Environmentally friendly – they don’t contain mercury or other harmful substances (Source). 

  • Energy-efficient (Source).

  • Generate low levels of heat.

  • Available in a wide variety of colors.

  • Brighten immediately when switched on, making them ideal for traffic and signal lights (Source). 

  • Saves money since they have a longer lifespan and use less energy.

Disadvantages 

  • Possible color shift during the lamp’s lifetime.

  • The lifetime of the lamp can be reduced in areas of high heat.

The Future of LEDs

According to the Office of Energy Efficiency and Renewable Energy’s (EERE) Energy.gov, “many white LED lighting products [are] available on the market, and the number continues to grow, with new generations of devices constantly emerging.” The same organization notes that LED lighting technology is rapidly being adopted because of falling prices and enhanced efficiency. However, Energy.gov also notes that “the technology can still be improved in efficiency, color attributes, light distribution, form factor, and building integration.”

Energy.gov continues to note that “there can also be improvements in new frontiers of lighting that include energy savings from more effective use of lighting, lighting that promotes health and productivity, and expanded use of controls to deliver just the right light at the right time” (Source).  

As more governments worldwide support environmentally friendly policies to reduce global warming, technologies like LED lighting will likely become more popular. As they become mainstream, the economies of scale will likely result in falling prices and greater accessibility.   

More LED Ideas and Advice

LED Ceiling Lights for Small Spaces

LED and Color Temperature Explained

How and LED Light Bulb Works

LED Lighting: Backlighting Basics

Contributor: Lamps Plus Ideas & Advice

Common Home Repairs You Should Never Do Yourself

RH Business Marketing Solutions

Adding value to your home is a job worth every praise. A good remodel can completely change and improve your living space. There is a wide array of fixtures you can do around the house, but have something in mind before you start the process. There are some common home repairs you should never do yourself. Even though they might look simple, you can end up hurting yourself, or doing a poor job which will result in additional expenses. With that in mind, do not waste your time trying to fix these seemingly simple issues.

Electrical installations

Having faulty electrical installations is a huge hazard for all the members of your family. Furthermore, it can lead to a fire and endanger not only you but your neighbors as well.

While replacing a bulb does not require professional help, hiring an electrician to fix bad wiring, replace a power socket, or resolve more complicated issues is a smart and safe move.

Plumbing fixtures that require professional assistance

Fixing plumbing around the house is never easy. Leaky pipes and similar issues have a bunch of quick, temporary solutions. However, putting a small bandaid on an open wound will not stop the bleeding. The situation will only get worse over time until you finally admit the inevitable; you need professional assistance.

Unclogging a sewer line

This is one of those plumbing fixes you should not ever try, even if you have access to it. Firstly, this problem requires specialized equipment that you don't have in your garage. Secondly, a poor job may result not only in sewage backups that will damage your property, but it also poses a huge health risk for everyone in the area.

If you have a problem that requires sewer or drain cleaning, do not hesitate to call a professional plumber.

Pipe replacement

Risking a flood in your home is not a good idea. If you have pipes that need replacement, it is always safe to call an experienced plumber. If you are not familiar with plumbing installations in your home, you might remove a pipe that still has access to water. This action will only cause more damage to your property.

Furthermore, have in mind that some pipes are not accessible without breaking the wall. Some even go underground, which is especially hard to fix without knowing how to locate and fix the issue properly.

Water heater installation

Water heaters are heavy, bulky, and tricky to set up on your own. If you have a small bathroom, the entire process will be even more difficult. Besides connecting the water heater to the pipes, there are also electrical installations that require setup.

If you hire a professional to install the new water heater, you are:

  • avoiding possible injury

  • making sure there is no additional damage or expenses

  • reducing the stress and frustration of attempting this complicated installation

  • making sure that the fix is done within 24 hours

Leaking gas line

One of the most dangerous repairs to do on your own is to fix a leaking gas line. So many things can go sideways, and one wrong move may result in an explosion that will lead to your death. Furthermore, it might even happen that you think you have fixed the issue, but the gas is still leaking, you just don't know it.

The safest solution is to call a professional. There is no reason to put yourself and your loved ones in danger over something that a skilled professional could resolve safely and in a timely manner.

Tearing down walls

People remodel homes on a regular basis. They feel the need to rearrange the floor plan in their new homes to suit their needs. They remove walls to make more space. If you have decided to move to, say, Illinois, you have probably already spent a lot of time finding someone to help you out with this relocation. So if you have an intention to make such changes in your new house, there is no reason to increase the stress levels by tearing down walls on your own. This is definitely high on the list of the most common home repairs you should never do yourself.

It's a difficult job. More importantly, you have to be familiar with what walls you can remove without damaging the structural integrity of the house. There is no room for error here.

Roof repairs

The last on our list of common home repairs you should never do yourself is fixing the roof. Any roofing issues are delicate and must be dealt with precision and control. A broken tile can quickly turn into a more significant problem. Also, there is always the danger of falling to the ground and, best case scenario, breaking something.

Hiring a roofer with experience will save you a lot of unnecessary trouble, and your roof will be fixed in no time.

Where to find a professional repairer?

The Internet is full of advertisements for various house repairs services. However, what is the most effective way to find quality help? You can never know if you hired a good person for the job before they come to your house and start fixing things.

What you can do is read online reviews of previous customers. There is nothing better than finding a good recommendation from a satisfied client. That is the only way to know that the person you hired is trustworthy!

Common home repairs you should never do yourself - explained!

There are plenty of things you can change in your home on your own. However, when you encounter common home repairs you should never do yourself, it is always the best solution to call a professional. Hiring a maintenance specialist will cost you, but the value and expertise you get in return are entirely worth it. All of the repairs will be done quickly and efficiently. Most importantly, the total experience will be stress-free for you. There si no need to bang your head because repairs are not going the way you want them to. With that in mind, pick up the phone and call for help!

Guest Contributor: Sophia Perry