Plumbing Diagrams and Layouts for Bathroom: The Ultimate Guide
RH Business Marketing Solutions
Technology and modern conveniences are common in our homes today. In fact, the market for do-it-yourself home improvements is set to grow at a 4.5% CAGR through 2027. And one of the nooks in your house that needs improvement is your bathroom. They can be small or large, with all kinds of fixtures, including sinks, tubs, toilets, and showers.
Nothing beats the comfort and luxury of relaxing in your own bathroom. And you don't have to stick with the standard layout of only a few square feet. So, why not make use of all your space with the right professional plumbing services? Bathroom plumbing layouts are as important as the fixtures within them.
Your bathroom renovation is beyond the safety of your existing pipes. It also addresses issues like space and future needs. This guide will walk you through bathroom layouts, dimensions, and other considerations.
1. Choose the Right Plumbing Supplies
Your bathroom should be functional, safe, and efficient. That means you have a comfortable bathtub, smooth drains, and everything placed exactly where you need it. But that doesn't mean you have to spend a lot of money doing it. You can make plumbing fun and affordable if you want to.
Designer plumbing supplies are one thing. You can also add ergonomic bathroom layouts to them. Plumbing supplies from PlumbersStock distinguish your bathroom in any market. A few unique designs can help you raise the bar for your home.
Consider these materials for your plumbing plans:
PVC pipes. Use PVC pipes with a 3-inch diameter for the main drain and the small section connecting the toilet to the drain. Use a 2-inch one for vents and more drain lines.
Cast-iron pipes. Cast-iron pipes don't make a lot of noise compared to plastic pipes. That's why most homeowners prefer these materials. If you want one, make sure to leave the installation to the professionals.
Rigid copper pipe. This is the most common material used for water delivery lines. Standard plumbing for bathrooms is 1/2-inch pipe. For the best water pressure, run 3/4-inch pipe to the bathroom and only use half an inch for short lengths.
Your bathroom layout depends on the plumbing fixtures and fittings you select. So, you should get them as early in the process as possible. But do make sure that your plumbing supplies match your budget. You don't want to spend a lot on the materials only to be short in other aspects of your bathroom.
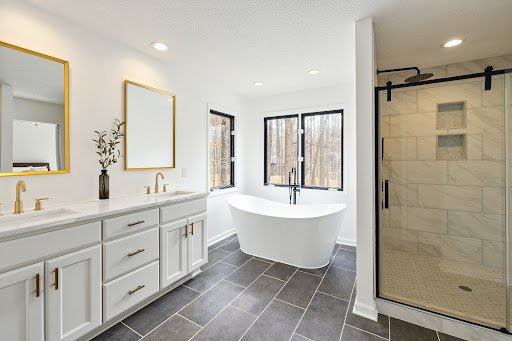
2. Select from Popular Bathroom Layouts
Spend some time considering your needs and designing an efficient bathroom layout. After that, you can begin arranging the components, such as the bathtub, shower, toilet, and sink. See which of the well-liked bathroom layouts below best suits your needs and home.
Three-Quarter Bath Layout (No Tub)
This efficient design for a guest bathroom has one sink, a toilet, and a shower. Having all plumbing on one wall reduces labor and material costs. This makes it the most cost-efficient layout in the list.
But since it's small, make sure you organize the space efficiently.
Full Bath Layout
A full bathroom has a shower, a sink, a tub or shower, and a toilet. This floor layout is the best choice if you have a small house.
Much like the three-quarter bath layout, the plumbing fixtures are all on one wall. A full bathroom also offers room for a large or double vanity.
Versatile Primary Bathroom Layout
This bathroom layout starts at 36 square feet. This is ideal if there are people sharing a bathroom, yet you have little space.
The plumbing fixtures are set on two walls, with the vanity and toilet on one side and the tub or shower on the other. Using a double vanity is space-efficient, with end shelves for more storage. Consider a walk-in shower as well, since it costs less because there isn't a door needed for it.
Large Primary Bathroom Plan
Spread out your fixtures in a 10 by 12-foot area for a more opulent bathing experience. To create a nice focal point, place the bathtub next to a window.
With this bathroom layout, you can have double vanities. This gives each of your family members their own space. You can also add a door to the toilet space, which also increases privacy.
Handicapped Bathroom Layout
Bathrooms for people with disabilities must be at least 3 by 5 or 15 square feet in size. The doorway is at least 32 to 36 inches wide, or 2.5 feet.
Since it's a handicapped bathroom, make sure the toilet and handle are closer to the ground. You should also have safety bars and other handhold supports.
3. Consider Rough-In Plumbing Dimensions for Bathroom
Remember that not all dimensions are absolute. Think of these dimensions as broad principles: they change based on your bathroom. If you want a more specific measurement, you can refer to the instructions that came with the fixture.
Toilet Rough-In Details
Supply line (height). The water supply pipe for the toilet should enter the space 8 and a quarter inches above the floor. The pipe for cold water only leaves a single hole 5 to 10 inches above the ground.
Supply line (horizontal). The hole for the water supply line should be 6 inches away from the center. To verify the location of the water supply connection, check the toilet.
Discharge hole from the back wall. The hole is 12 1/2 inches away from the back wall.
Discharge hole (vertical). The drain is at floor level; there is no distance.
Fixture (side-to-side buffer): There must be 15 inches of clearance from any wall or other fixture. Recommended size: 18 inches.
Fixture (front buffer): The clearance to the nearest obstruction, measured from the front rim of the toilet forward, is 21 inches. Recommended size: 30 inches.
Sink Rough-In Details
Supply line (height). There are two holes, 2 to 3 inches above the drain pipe.
Supply lines (horizontal). The distance between the centerline of one hole and the centerline of the other is four inches.
Discharge hole (vertical). Consider the drain pipe to be the vertical centerline at a height of 16 to 20 inches above the ground.
Fixture (side-to-side buffer). Minimum distance from centerline: 15 inches; recommended distance: 20 inches.
Fixture (front buffer). The required distance is 30 inches, with a minimum of 21 inches to the next barrier.
Placement of sink. At the rim of the sink, the sink should be around 31 inches above the floor.
Shower and Bathtub Rough-In Details
Discharge hole (vertical). The drain is at floor level; there is no distance.
Fixture (side to side buffer): The minimum necessary buffer is 18 inches.
Fixture (front buffer): The minimum necessary buffer is 18 inches.
4. Plan Vents and Drain Lines
Consider the thickness of the wall finishing material for new framing. For drywall, allow about half an inch; for wall tiles, allow another 3/8 inch.
Vents
Determine the location of the vents first. Each fixture's drain line should, in general, attach to a vent within a few feet of the fixture. Water never flows through a rear vent. You can also get wet venting in specific circumstances.
Drains
Your bathroom's new main drain line should descend to the floor below. You can tie the new bathroom into the house's main drain line in the crawlspace below if it is on the first floor.
The main drain should go through the first-floor wall and down to the crawlspace if it's on the second floor. You can connect a pipe to an existing drain line rather than install a new one if there is one close by.
5. Recognize Your Drain-Waste-Vent System
The hot and cold water lines can be set up in any practical way. Run a separate 3/4-inch line from close to the water heater to the shower. This lets you use another fixture without compromising the water pressure and temperature.
6. Find the Wet Wall / Shaft Wall
Every home has a "wet wall," also referred to as the "shaft wall." It houses the main plumbing drainage pipes and is thicker than an interior wall. It is where water lines and other plumbing lines are set. If you place fixtures on or near this wall, you can use fewer pipes and connections.
7. Slope
Most plumbing guidelines recommend a 0.25-inch slope per foot on a horizontal drain pipe. And some specify a 1/8 inch slope per foot for pipes with more than 3 inches in diameter. This helps your bathroom have a consistent water flow.
To Wrap it Up
Let's be real—not everyone is a designer. And not everyone needs to be. But, it is still important for you to understand the basics of design. That's if you're going to speak with confidence about the look and feel of a bathroom layout.
Discovering new bathroom layouts makes more efficient use of space. When you have the best plans in place from the start, you’ll be sure to end up with the perfect bath.
And remember: a bathroom isn’t only a place to get ready. Consider it your sanctuary. Make it feel like home by making the most of all the bathroom space you have.
Guest Contributor: Daniel