How to Prepare a Room for Painting
RH Business Marketing Solutions
Most people have been spending more time at home lately - you might be sick of those bright blue walls that were so trendy five years ago. Does a room in your home need a refreshment? A good place to start is with a fresh layer of paint. If you plan to sell your home, painting is a great remodeling strategy that provides a handsome ROI. But before you break out a bucket and roller, you’ll need to take some steps to get everything in order. Properly preparing a room before painting it will ensure the best results:
Move or cover all the furniture. Ideally, you should move all your furniture out of your room, but that’s not always possible if you’re short on space. In that case, use drop cloths to cover all your furniture from accidental paint splatters. Protect your floors by covering them with drop cloths, as well.
Clean the walls. Dust will interfere with a smooth paint application. Use a vacuum on baseboards and crown molding to clean those hard-to-reach places. Then, wash your walls with a cloth and warm soapy water. This will remove any stains and dirt. If you’re painting a room that’s been exposed to oil (like a kitchen), you may need to use a grease-removing product. Humid areas like the bathroom may have mildew growing in the corners, in which case you’ll need an abrasive sponge and a solution with bleach. Allow the walls to dry completely before applying any paint.
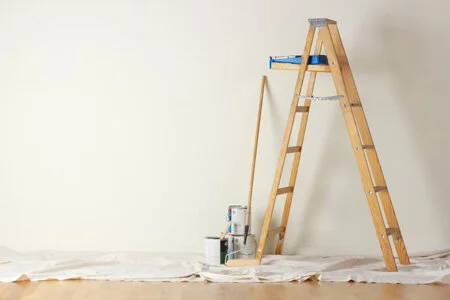
Assemble your tools. Unfortunately, paint doesn’t apply itself. You’ll need to arm yourself with the right supplies to do a good job. Make a list of the items that you have and what you’ll need to pick up from the hardware store. To name a few here, you’ll need paint, brushes, a roller, a tray, painter’s tape, cleaning rags, drop cloths, and clothes that you won’t mind getting covered in paint.
Wear protective equipment. Before you open up a paint bucket, wear a respirator mask! It’s important to wear one that can filter out harsh chemicals. Beware of harmful chemicals that can irritate your lungs and cause headaches. If you can’t wear a mask, be sure to open all doors and windows to allow a cross breeze through the room.
Repair any holes or damages in the walls. For this step, you’ll need putty, a knife, and sandpaper. Fill in any holes or imperfections on your wall using the putty and smooth the raised edges with the knife. Once it’s dry, file it down with sandpaper so that it’s level with the rest of the wall. If the existing paint is flaking in any areas, smooth it away using sandpaper to ensure a smooth application of paint.
Protect electrical elements and light switches. Remove the covers from electrical outlets and switches, and cover them with painter’s tape. You don’t want the paint to get inside of your electrical outlets, so don’t neglect this step.
Use painter’s tape around baseboards and windows. You are painting your room, but you don’t want to paint everything in it. Seal the edges surrounding your doors, windows, baseboards, and crown molding. If you have painted before, then you’ll know the satisfaction of removing the painter’s tape once you’ve finished the job. Something to keep in mind is that you should never remove the tape before the paint has dried completely, or else you’ll wind up with jagged edges. Rather than ripping it off all at once, try to do it slowly.
Choose your wall color. The final step is choosing which color will work best for your space. If your room is small, select paint colors to make a room look bigger. But if size isn’t a concern, then you have free reign. Those who want to sell their homes in the future should keep in mind that most buyers like neutral colors. There’s also the option of going bright and bold - it is your home, after all. Once you’ve chosen your color, determine how many gallons of paint you’ll need by measuring the square feet. When covering a darker color with a lighter one (like black to white), you will need a few extra coats. Factor in that you might want a little extra to use for touch-ups in the future.
Apply a primer. A base coat will help your paint job last for years to come. It can also help you transition from a darker color to a lighter one. The primer you need will depend on the type of paint you’re using. Oil and water don’t mix, so if you’re using an oil-based paint, you’ll need an oil-based primer (and vice versa for latex-based paint).
The painting process will go much more smoothly if you take the above steps first. After all this preparation, rolling layers of paint on your walls will seem like a breeze. It’s amazing what a coat of paint can do to transform a familiar space and make it feel brand new.
Guest Contributor: Christie Simon